Link: https://resources.elluciancloud.com/bundle/cl_stuforms_acn_use/page/t_stuforms_parent_account_create.html
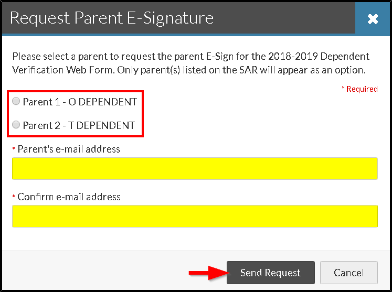
In order for a parent to create an account, a student must request their e-signature
on a document within Student Forms (Figure 3).
(Figure 3)
A student selects which parent they would like to sign the document and inputs their
parent’s email address and the parent is sent a link to create an account (Figure
3).
If a student cancels the request for an e-signature, the parent will be unable to
create an account until the student sends the request (Figure 4).

(Figure 4)
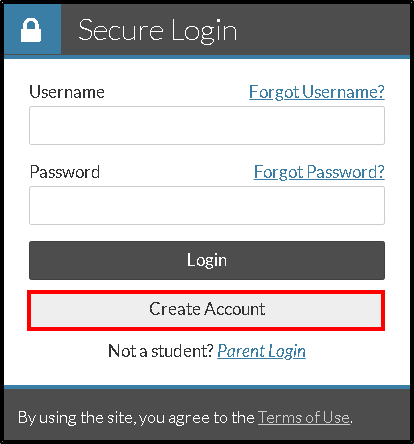
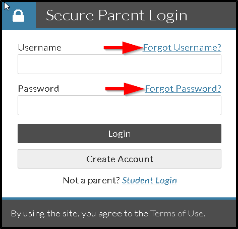
From the email sent to the parent, they are sent directly to the ‘Secure Parent Login’.
Parent will need to “CREATE ACCOUNT” (Figure 5).
(Figure 5)
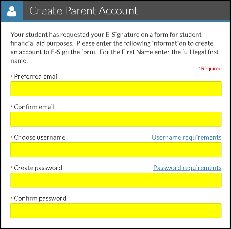
Parents will need to select ‘Create Account’ button from the login page to be taken
to the ‘Create Parent Account’ page where they will input their preferred email (2
parents cannot use the same email address), select a username and password (Figure
6).
(Figure 6)
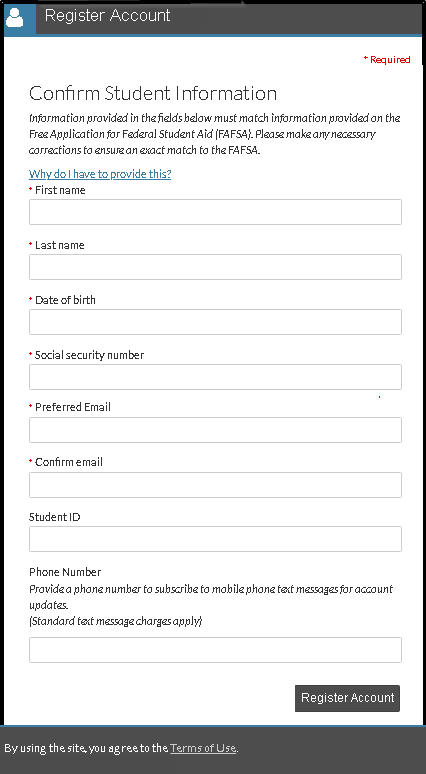
They will also be asked to confirm their information and this information must match
exactly what is listed on the FAFSA (Figure 7).
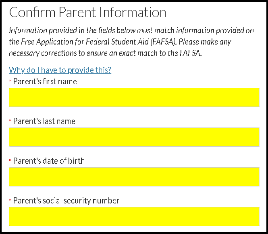
(Figure 7)
Parent(s) will then be asked to confirm which student they are signing forms for and
must provide information for their student that matched the information on the FAFSA.
(Note: ‘parent’s first name’ ONLY requires initial, as this is how it is entered on
the FAFSA. Finally, the parent must select the ‘Create Account’ button (Figure 8).
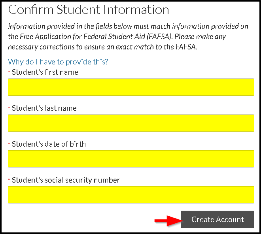
(Figure 8)
- When a parent creates an account, they will receive a confirmation email with the
subject “ACTION REQUIRED-Email Verification”.
- Within this email, there is a link for the parent to verify their email address, similar
to when a parent creates an FSA ID.
- If a parent does not verify their email address, they will not be able to use “Forgot
Username/Password” links on the login page.
Occasionally, we will need to resend the email verification link, which can be done
by clicking the edit box in the parent information section (Figure 9):

(Figure 9)
Followed by the ‘Verify’ box next to their Preferred Email (Figure 10):

(Figure 10)
Once an account has been successfully created, the parent will view the document the
student requested their signature on.
The parent will need to select “Preview” to view the full document when they log-in.
The “Form Not Approved” and “Opt Out of E-Sign” are information buttons only (Figure
11):
- The “Form Not Approved”, lets the parent know if there are corrections needed, the
student must make the corrections.
- The “Opt Out of E-Sign” button lets the parent know if they do not want to e-sign,
their student must also opt out of e-sign.
If everything looks correct, the parent enters their password into the e-sign password
box and clicks ‘e-sign’ (Figure 11).
The parent will receive a success message when the e-signature is applied:
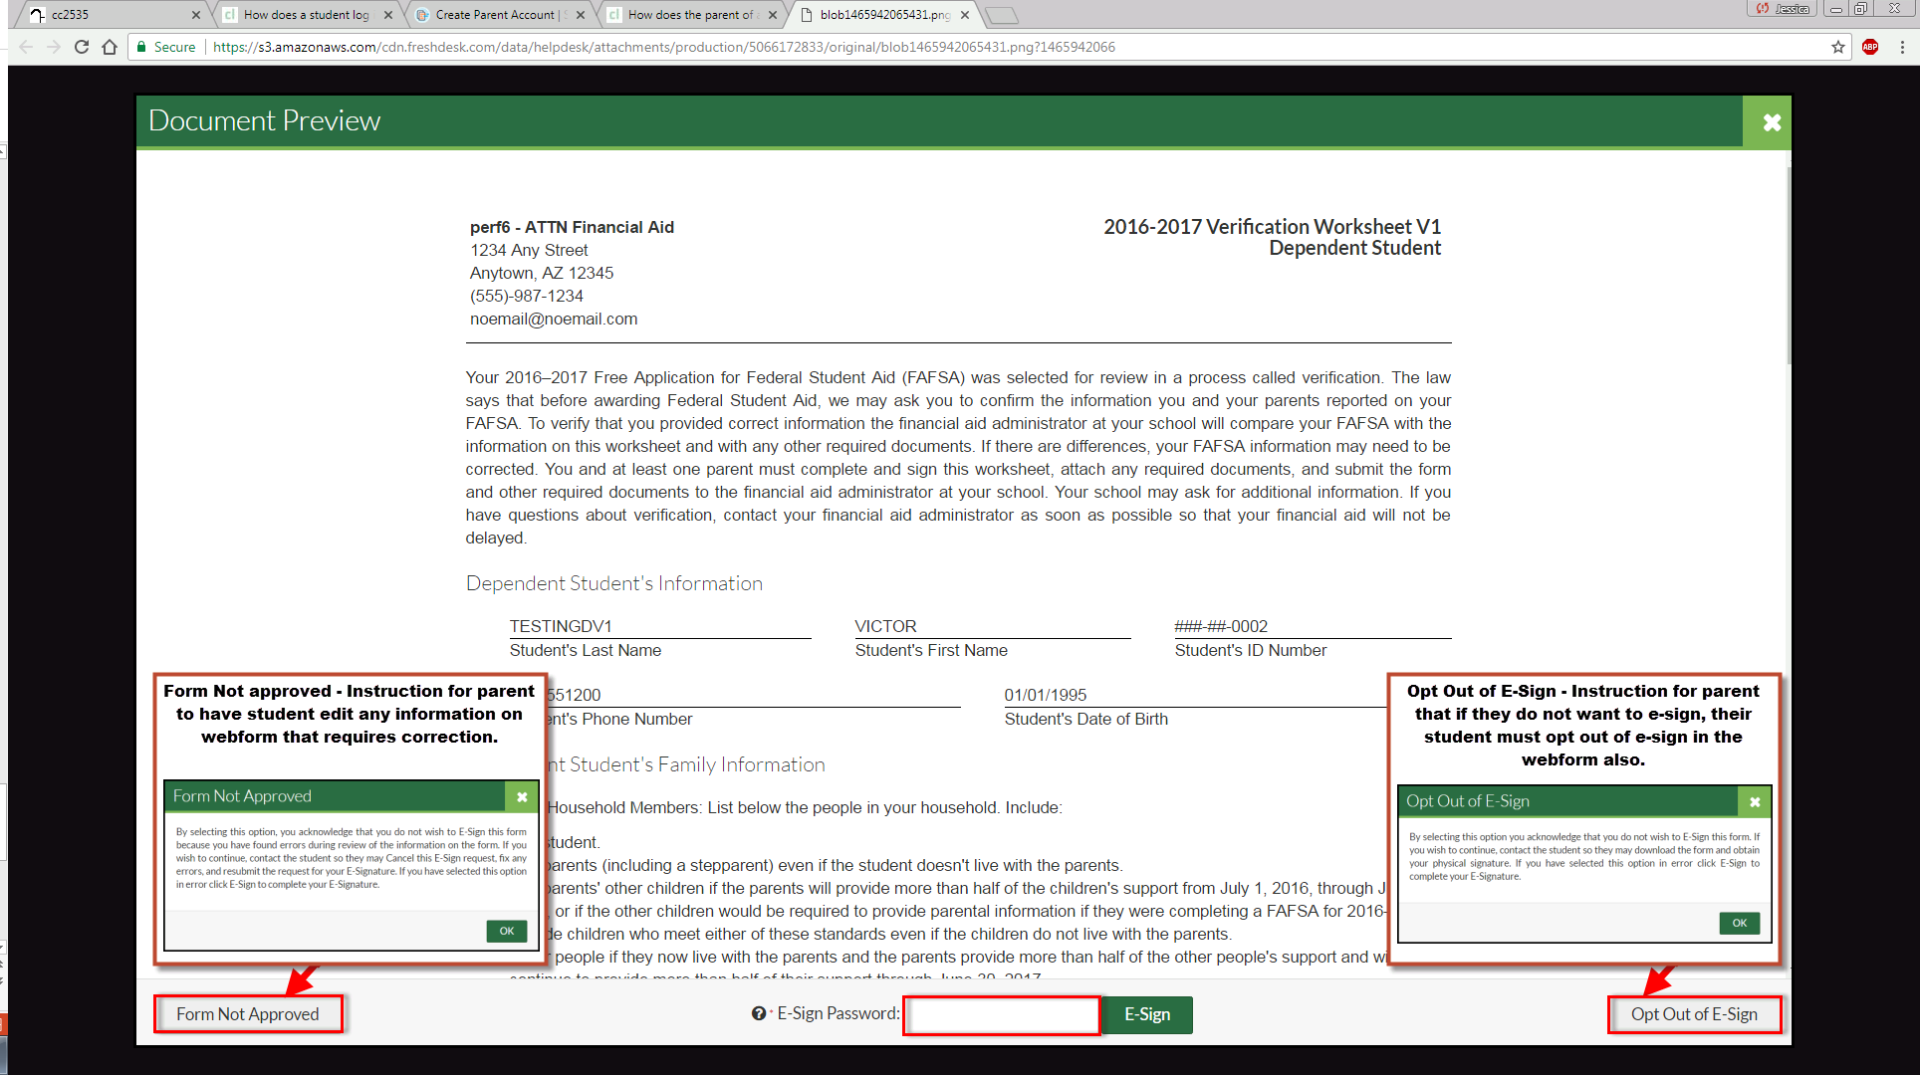
((Figure 11)